Here's a great site with descriptive diagrams of how to create a foundation chain of single crochet. Great when creating something like a scarf lengthwise, where you don't want a chain foundation that might tug and pull too much. http://snuffykin.livejournal.com/43642.html
Showing posts with label crochet border. Show all posts
Showing posts with label crochet border. Show all posts
Wednesday, May 2, 2012
Tuesday, November 15, 2011
Northwest Medical Center 550-Item September 20, 2011 Delivery
550 items delivered to the Women's Center at Northwest Medical Center, Tucson. That's 196 blankets, 225 beanies, and 129 booties!! Such a wonderful delivery of Holy Needles' creations!


beautiful quilts!


Kim, Terry, and Elaine enjoy participating in the delivery!


The nurses at Northwest enjoy accepting the newborn items.
They love handing out the items to the newborn's families!


Kim holds up a gorgeous quilt, created by a member of Holy Needles!

That's Elaine hiding behind those blankets!


beautiful booties!


many comfy blankets... created by making a crochet edge around a yard of fleece
that has been trimmed and holes created every 3/8" of so.

Donna, Kim, Terry, and Elaine enjoy making the deliveries.
Friday, November 4, 2011
Summer 2011, Happening Around the Meetings
Around the meetings... summer of 2011.


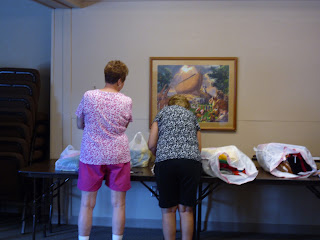


Becky, Linda, and Pat are busy, busy!

Terry is about to label her created items. She makes SEVERAL newborn items monthly!

Ruth is about to cut some fleece for baby blankets.

Terry and Karen sort through and label some finished products.

Yes, Becky, I'm taking your picture! :)

Ruth has completed a pile of newborn blankets.

so busy!

Sorting through many baby items.

Pat and Ruth in action.


Pam is a pro at cutting fleece and putting holes into the edges. We all appreciate all the work Pam does to make the fleece blankets available to be edged with crochet!

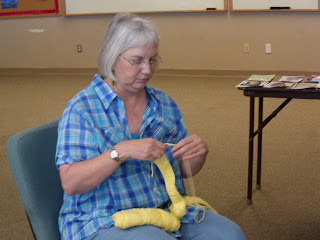
Karen is learning to crochet, thanks to her prolific friend Terry!

Kim is renewing her crochet skills.

prayer shawl books 'won' on facebook from Leisure Arts! available to members to borrow.

beautiful work!

new member Kim gets right into crocheting!
Friday, September 30, 2011
Creating a Crocheted Border on Fleece

Repeat all around fleece single crochet, chain 1. In the corners, create 3 single crochet stitches (NO chain inbetween). When you finish, you will use a tapestry needle to weave in your ends, back and forth nicely. The original tail will initially finish the V stitch visualized on the back of the fleece, then you can weave. NEVER use knots... ALWAYS leave tails & WEAVE!

Again... NEVER use knots... ALWAYS leave tails and WEAVE!
Copyright 2010 by Donna Bishop... all rights reserved.
Using the Skip-Stitch Blade to Create Blanket Borders...
This is a great tool for putting holes into fleece edge, to be able to crochet a border. The tool is a blade for a 45mm rotary cutter.
It's called a skip stitch blade. check it out at http://www.skipstitch.com/products.htm

Also, check out a You Tube video on using this blade. It's not done quite the way we do it... we put holes 3/8" - 1/2" from the edge. Also, place the clear straight edge over the edge of the fleece, so that you can use the measurements on the straight edge as your guide. (Maybe someday we'll create a video!)
Thursday, July 21, 2011
Edging Fleece with Crochet
Fleece Blanket using Skip-Stitch blade to crochet edge

Easy-to-follow instructions for making a blanket using a Skip-Stitch blade (blade available at http://skipstitch.com/ )

Scallop pattern: work this into the foundation row, or after a second row of single crochet, or try something different!

Easy-to-follow instructions for making a blanket using a Skip-Stitch blade (blade available at http://skipstitch.com/ )
- Place fleece on self-healing cutting mat. Cut fleece into size desired, removing selvages (if necessary). (Rounding corners is optional... use plate or container cover to create rounded corner).
- Position see-through ruler over 1/2" - 3/4" edge of fleece.
- Using a 45mm rotary cutter with the Skip-Stitch blade installed, run cutter along edge of ruler with enough pressure to perforate the fleece.
- Reposition ruler to continue cutting. Place a blade tooth in the last perforation in the fleece, and continue cutting.
- With right side facing you, just to the left of a corner, start edging the fleece by putting your hook (size H is favorable) through a hole, from the front, picking up the yarn from the back. Pull through and continue to work a single crochet. Chain 1. Continue single crochet, chain 1 around the fleece, completing the round with a slip stitch atop beginning stitch. (Work 3 single crochet stitches in each corner if you did not round the corners).
- Options: crochet only this initial row, add another row of single crochet, or try anything creative!

- From the front side of your project, slip-stitch into the foundation row.
- Skip a stitch and work 3 double crochet stitches in the next stitch .(or 3 hdc)
- Skip a stitch and slip stitch into next stitch. Continue around, finishing the row with a slip stitch into the original slip stitch. (compromise as needed for a neat finish).
- Finish by weaving in ends. NO KNOTS!
Saturday, July 16, 2011


Subscribe to:
Posts (Atom)